SharePoint REST API: Register and Connect to a SharePoint List with Bearer Token
Register a new app in Sharepoint and get Bearer Token for Postman
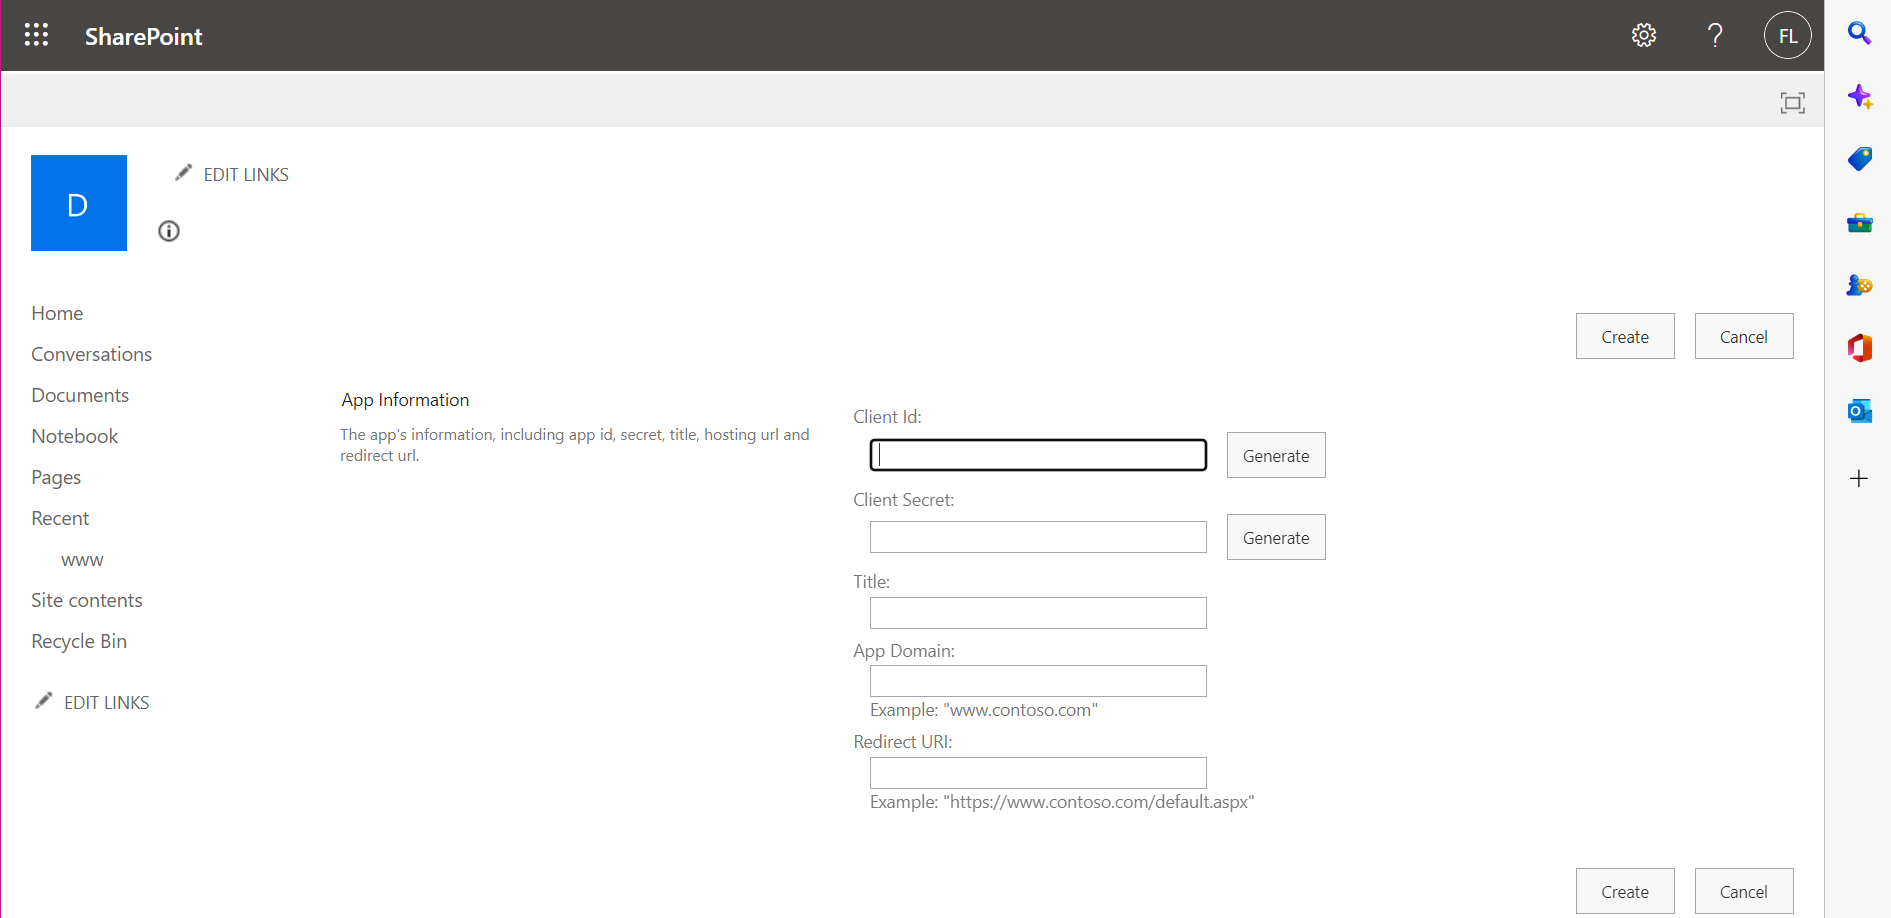
1. https://[tenant].sharepoint.com/sites/[SITE]/_layouts/15/appregnew.aspx
- Client Id: [click generate]
- Client Secret: [click generate]
- Title [Title of app]
- App Domain: localhost
- Redirect URI: https://localhost/sharepoint/completed.html
- Click [Create]
2. Look for message: The app identifier has been successfully created.
- Client Id: xxxxxxxxxxxxxxxxxxxxxxxxxx
- Client Secret: Lxxxxxxxxxxxxxxxxxxxxxxxxxxxxxxx
- Title: TestingApp
- App Domain: localhost
- Redirect URI: https://localhost/sharepoint/completed.html
- Click [OK]
3. Go to: https://[tenant].sharepoint.com/sites/[SITE]/_layouts/15/AppInv.aspx
- Client Id: [ENTER THE CLIENT ID YOU GOT FROM PREVIOUS STEP] [Lookup]
see for help on XML: https://medium.com/ng-sp/sharepoint-add-in-permission-xml-cheat-sheet-64b87d8d7600 - ENTER XML:
<AppPermissionRequests AllowAppOnlyPolicy="true">
  <AppPermissionRequest Scope="http://sharepoint/content/sitecollection/web"
   Right="Read" />
</AppPermissionRequests>
Available Rights:
- FullControl
- Manage
- Write
- Read
Click [Create]
4. You will get a message: Do you trust TestingApp?
- Let it read items in this site.
- Let it share its permissions with other users.
- Let it access basic information about the users of this site.
Click [Trust It]
5. Confirm access was added in the Site Collection App Permissions
https://[tenant].sharepoint.com/sites/[SITE]/_layouts/15/appprincipals.aspx
6. Open power shell and install the latest PnP.PowerShell (as of Nov. 2022)
Install-Module -Name PnP.PowerShell
7. Login to your sharepoint site to get the bearer token
Connect-PnPOnline -Url "https://[Tenant].sharepoint.com/[site]" -Interactive
Copy the bearer token to your clipboard
Get-PnPAppAuthAccessToken | Clip
If you want to see the token, you can also send this command:
Get-PnPAppAuthAccessToken
8. Open postman and create a new connection with the following settings:
Name: [Whatever you want]
Authorization > Bearer Token
Add to Body: Accept: application/json
30-p5021-sharepoint-api-postmant-bearer-token.png
9. Hit the Get button
10. Here is an example code you can use in a React component for example:
import React from 'react';
const App = () => {
  const token = "yourtokenhere";
  const [result, setResult] = React.useState();
  React.useEffect(()=>{
    fetch('https://example.test/', {
      method: "POST",
      headers: {"Authorization": `Bearer ${token}`}
    }).then(res => res.json()).then(json => setResult(json));
  },[]);

  return (
    <>
      {JSON.stringify(result)}
    </>
  );
};
* Script Source: https://stackoverflow.com/a/65118513
Good Resources:
https://global-sharepoint.com/sharepoint-2/in-4-steps-access-sharepoint-online-data-using-postman-tool/